How to Send Emails from Google Sheets Automatically
How to Send Emails from Google Sheets Automatically (The Easy Way)
Google Sheets is a powerhouse for organizing data—contact lists, sales leads, project statuses, and event attendees. But what happens when you need to act on that data? Too often, it involves a painful, manual process of copying email addresses and pasting them into Gmail, one by one.
What if you could use your spreadsheet as a command center to send emails from Google Sheets with just a single click or a simple word?
This isn't about complicated mail merge add-ons or writing code. This is about true automation. In this guide, you’ll learn how to set up a powerful workflow that turns your Google Sheet into an automated email-sending machine, perfect for personalized outreach and follow-ups.
Why Would You Want to Send Emails from Google Sheets?
The use cases are endless, but here are a few of the most popular ones:
- Sales & Lead Follow-ups: Trigger a personalized follow-up sequence by simply changing a lead's status in your sheet.
- Personalized Marketing: Send tailored offers to a segmented list of contacts directly from your database.
- Event Management: Send invitations, reminders, or post-event thank-you notes to your list of attendees.
- Project Updates: Notify clients or team members of a status change on a project tracker.
The Smart Way: Triggering Emails with Inboxells
While there are complex solutions involving Google Apps Script, a much simpler and more powerful way is to use a dedicated tool like Inboxells.
It allows you to create a trigger inside your Google Sheet—like changing a cell's value—to send a fully customized email from your Gmail account.
Here’s the step-by-step process.
Step 1: Prepare Your Data in Google Sheets
Your Google Sheet is your database. The first step is to make sure it's organized correctly. You need, at minimum, a column for the email address. For personalization, add columns for other data points.
A simple lead tracker might look like this:
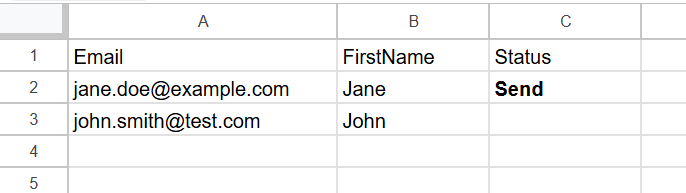
The "Status" column will be our trigger.
When we type Send into that column, the email will be sent.
Step 2: Create a “Sheets → Gmail” Automation
- Log in to your Inboxells account.
- From the dashboard, click the green button: “Automate: Sheets → Gmail”.
- This opens the configuration screen for your new workflow.
Step 3: Configure Your Email Trigger and Template
This is where you design your automated email.
1. Google Sheets Configuration
- Spreadsheet ID: Paste the ID of your Google Sheet.
- Sheet name: Enter the name of the sheet (e.g.,
Sheet1). - Trigger Column: Specify the column that will activate the automation. In our example, it's the
"Status"column. - Trigger Keyword: Enter the word that will fire the email. Let’s use
Send.
2. Gmail Configuration
- Recipient Email Column: Tell Inboxells where to find the email addresses. In our case, it's the
"Email"column. - Subject: Write your email subject line. You can personalize it! For example:
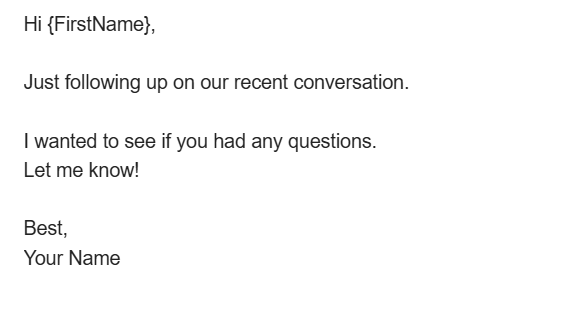
A quick question, {FirstName}. - Email Body: Write your email content. Use placeholders (like
{FirstName}) to pull data directly from your other columns, creating a fully personalized message for each recipient.
Example Email Body:
Step 4: Save and Test Your Automation
Click “Save automation.”
Now, go back to your Google Sheet. In the “Status” column for Jane Doe, type the word Send and press Enter.
Within moments, Jane will receive a personalized email from your Gmail account.
You’ve just learned how to send emails from Google Sheets automatically.
Ready to automate your workflows?
Try Inboxells for free and start automating Gmail and Google Sheets today.
Get Started for Free